The 2.0-inch TFT display with the ILI9341 controller uses the SPI protocol. Unlike basic displays, this one allows for full color and fast refresh rates, making it perfect for your digital thermometer or clock projects.
Wiring Diagram (Arduino Uno)
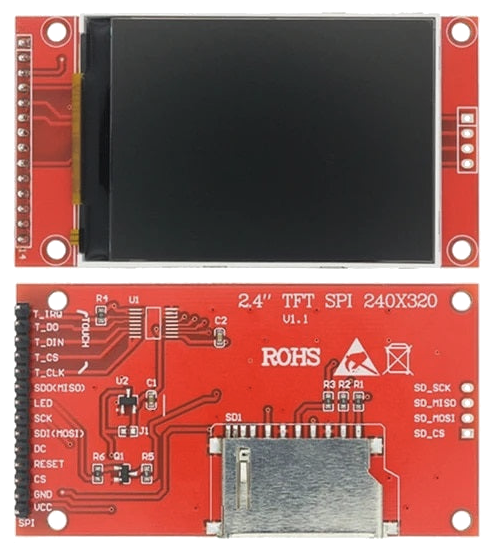
Connect the display to the following pins. Note that the SPI pins on Arduino Uno (11, 12, 13) are fixed and cannot be changed!
| Display (LCD) | Arduino Uno | Description |
|---|---|---|
| VCC | 5V / 3.3V | Power Supply |
| GND | GND | Ground |
| CS | 10 | Chip Select |
| RESET | 9 | Screen Reset |
| DC / RS | 8 | Data / Command |
| SDI (MOSI) | 11 | SPI Master Out |
| SCK | 13 | SPI Clock |
| LED | 3.3V | Backlight |
| SDO (MISO) | 12 | SPI Master In (optional) |
Required Libraries
To work with this display in the Arduino IDE, install the following libraries:
- Adafruit GFX Library (core drawing library)
- Adafruit ILI9341 (driver for your specific screen)
Test Code
#include "Adafruit_GFX.h"
#include "Adafruit_ILI9341.h"

#define TFT_DC 8
#define TFT_CS 10
#define TFT_RST 9

Adafruit_ILI9341 tft = Adafruit_ILI9341(TFT_CS, TFT_DC, TFT_RST);

void setup() {
    tft.begin();
    tft.setRotation(3); // Landscape mode
    tft.fillScreen(ILI9341_BLACK);
    tft.setCursor(20, 100);
    tft.setTextColor(ILI9341_YELLOW);
    tft.setTextSize(3);
    tft.print("Hello, Borut!");
}

void loop() {}